Tuesday, March 25, 2014

Baby C's Nursery!

I just sewed the last stitch of Caroline's nursery decor and am so excited with the finished product!  It's taken me long enough (she's already 6 1/2 months old!) but it was well worth the wait!

These are really poorly-shot before pics.  Actually mid-reno... notice the carpet pad... we switched out the carpet for laminate when we moved in, added baseboard, and then left everything until baby came.


And here is the after!
**Everything is photographing a bit darker and more vibrant than it really is, but I'm a little too lazy to color correct everything before posting so just use your imagination!**


Before baby was born, I had decided on a color palette of Navy, Yellow and Seaflower (Valspar's name for a light sea-blue color) with plans to throw in a little salmon-y pink if I had a girl.  I had intended to paint my crib yellow, which surprise, surprise, I never got around to doing.  However I did redo the change table I had from baby #1.  I forgot to take a before picture but this is what it looked like:


Before

Removed door and painted interior of tower yellow along with knobs.
Painted the rest white and swapped out the top of tower with weathered wood.


The shelves above the changing table are Fabian shelves from IKEA and only cost $6.99 each!  Have I mentioned how much I love that store!  They come in an unfinished pine so I brushed on some watered down gray paint I had on hand and sanded them down just a bit to try and match up to the weathered wood top of the changing table.
I topped them off with cute little lamp from Target with a mini gallery wrap from my maternity session with BLP Photography tucked inside next to a few color coordinating craft books with a cute name block baby shower gift and some vases.  The shelf on the left is still a work in progress... the CD player is a must and I love the picture frame on the wall behind it. I also love the wooden circle but just threw the baby books up there to fill the space.  I guess I'm not quite done with the nursery after all!


This pillow was a gift from my pastor's wife.  It was so adorable it actually made me switch from my original color scheme plans!


She gave me a heads up on where to get the fabric and I sent it to my friend, the talented Shannon Nelson who whipped me up this coordinating quilt!  Shameless plug to check out her other stuff here!


I picked out my favorite print in the bedding and added fabrics in coordinating colors to make this ruffled crib skirt!!  I am not a sewer, per se, but I do have a sewing machine and access to Pinterest, and that's all you really need right?!  I also have a very patient mother who talked me through the tricky parts!  The crib skirt is actually 3 separate panels that are simple attached to the crib with stick on velcro.  When the crib mattress gets lowered, the panels pull up so the ruffles remain in the same spot. Bonus for me, I have a good amount of leftover fabric and an almost 5 year old who is dying to have a matching sundress with her 6 month old sister!!

I made a name sign for over her crib before I received the embroidered name pillow and name block gift...  But it's a pretty cute name so it works right?!  I also wanted something hanging above her crib, but hit my budget on the nursery a tish before.  So I re-purposed a hanging chandelier I had initially intended for my room with some card stock circles, and voila!


I bought curtain panels from Walmart for $10, but they were a little blasé and shorter than I wanted.  So I sewed a little of the pink ruffle fabric I had purchased for the crib skirt on the panels and they looked 100% better!


There is a little toy corner for when she is old enough to enjoy it. Two Expedit units and wicker storage bins from IKEA hold all the knick-knacks she could want and the layout of the units allowed for a vase behind to hold some corner-filling sticks.

I hung some simple paper lanterns above and a little cross wall decor from her grandma that has the best wording on it:

"Jesus Loves Me
You are a GIFT from above.
More PERFECT than I could have hoped for,
More BEAUTIFUL than I could have dreamed,
More PRECIOUS than I could have imagined."

The last thing is actually the first thing I made for her nursery.  I painted it to match the original color scheme so I had to repaint it, but I love seeing the pictures of our journey with her from maternity to birth and from photo shoots to snapshots!


And a final note...finishing the nursery was #7 on my New Year's Resolution list and I am checking it off!!  I also have checked off #1, 2, 4, 5 and 6!  Not to toot my own horn, but toot toot!!  Now to get going on #3!


Tuesday, December 31, 2013

My New Year's Resolutions

It has been an amazingly busy year with so many changes!  We found out we were pregnant with baby #3 near the beginning of the year, our other babies turned 2 and 4, we moved back home and bought a house that we spent the better part of the summer renovating and settling into, and we welcomed little Caroline in September!  Looking back on this year I feel an overwhelming sense of gratitude for my family and all the people in my life and am looking forward to what 2014 has to bring! 

I love the idea of New Year's Resolutions!  Getting a fresh start and setting the reset button to make the following year the best it can be!  Last year I gave myself a nice well-rounded list of resolutions here.  However, I have to be honest... my good intentions rarely make it past January... see here.  This year I'm getting smarter!  Working under the premise of "set your goals low so you're not disappointed", here are my 2014 New Year's Resolutions!

1. Get my little boy potty-trained!! 
I've declared every pack of diapers I've bought for the last few months would be the last pack of diapers I'd buy, but between his lack of interest and my lack of effort I just keep buying more!  Well he turns 3 in the Spring and this mama has had 2 kids in diapers long enough!

2. Put pictures in all my empty frames!!
I was good enough to get all the frames out and set up when we moved into our house, but have yet to put a picture in any of them!  I always refer to them as my ghost family!  So this is the year to actually put them to use!

3. Make photo albums of kiddos!!
With baby number one, I stayed on top of uploading pictures and creating a 1 year album online.  However, I never added the one year pictures and therefore never ordered the album!  Babies 2 and 3 have no pictures uploaded, and in turn, no albums started!  I've got to get started so I can remember all the important details!!

4. Do crafts with my son!!
I always think of Teddy as younger than he is.  When Natalie was his age, we had been working on numbers, letters, and shapes for months and had created crafts to go along with all of them.  He's already got the letter recognition down so I'm excited to get started on numbers, shapes and colors!

5. Play more games with my daughter!!
Natalie is a quality-time kid.  There is nothing she loves more than undivided attention from mom or dad.  She's always loved puzzles but has recently shown an affinity for games.  As a board game/card game junkie myself, I'm pumped about this and want to encourage it as much as possible!

6. Get Caroline on a schedule!!
You'd think by baby number 3 I'd have my methods down pat, but somehow I have an almost 4 month old still sleeping in my room and a nursery that's not quite ready yet.  Perhaps I have to put "finish the nursery" on my list!  Natalie and Teddy were both around this age when I was able to get them into a good nap schedule and bed time routine so I've got to start soon with Caroline! 

7. Finish the nursery!!
#6 made me think of this, and as one who loves to check off my list of things to do, I might as well add it to this list!

HAPPY NEW YEAR!!

Friday, December 13, 2013

Too busy

I can't believe how long it has been since I have written on here.  The last six months have brought a lot of change for our family, most importantly the addition of our sweet little Caroline!  She's already 3 months old, and while I could write paragraph upon paragraph about her adorable little smile, her striking blue eyes and auburn hair, and all the new things she is doing these days, I will save that for another post.  :)

Today, I am writing as a humbled mama.  Lately I have been feeling like I'm falling short as a mom.  My patience has nearly run dry and I yell way more than I want to.  My Facebook newsfeed seems to be spying on me as many friends have shared blog posts like "10 Things I Learned by not Yelling at My Kids" and other posts urging me to just give in and lay with my almost 3 year old who refuses to stay in bed.  Reading these posts has been encouraging... to know I'm not the only one who struggles with my temper or feels like a failure.  This posted video had me dissolved in a pool of my own tears one night, praying that my kids would say sweet things about me.

Today was "one of those days".  If you are a mother of small children, that phrase requires no explanation.  I was overtired from a night spent bouncing and swaying my 3 month old to sleep, my little guy's volume was stuck on high, and my baby girl was cranky and letting me know it.  My 4 1/2 year old daughter and I played a game of Uno and tried to start Chutes and Ladders but after a jealous little brother scattered the pieces we put it away.  The rest of the morning did not go well, and I dropped my little girl off at preschool at noon.  Later that afternoon, I found out that she did not act like her usual happy self at school so I asked her when she got home if she was sad at school.  She said "I missed my mommy".  I couldn't imagine why she would miss me given my less than stellar performance as a mother that morning.  I apologized for being crabby and for raising my voice at her that morning and she looked at me and said, "Mom, you were too busy". 

Those five words felt like a knife in my heart.  All morning she had been begging to play another game of Uno and I kept promising that I would as soon as (fill in the blank).  As soon as I get Caroline to sleep... as soon as you get out of the bath... as soon as I'm done washing the dishes... as soon as I'm done cleaning the kitchen... as soon as I change a load of laundry... as soon as I'm done paying bills... as soon as I'm done feeding Caroline... and then the time ran out. 

She wasn't sad about my temper or my raised voice.... she was sad that I didn't stop finding things to keep me busy and didn't just sit down and play cards.  I'm sure the day will come all too soon where she doesn't want to play cards with her mom, and I should be taking every opportunity I can to do it now.  With a "to-do list" that keeps growing and a holiday calendar that is overflowing with events, I need to remind myself to slow down, let the dishes sit in the sink, and play cards with my little girl.  

Wednesday, June 26, 2013

NEW HOUSE: Living Room

We recently purchased a new-to-us home!  Oddly enough, we closed on this house exactly 4 years and 1 day after we closed on our first home!  We moved out of our first home almost 2 years ago and after over a year-and-a-half stay in an apartment and a month-long stint in my sister's basement we were more than excited to be homeowners again!

Being the planner that I am, I pretty much had everything picked out for the house before we ever even found the one we were buying.  When I saw the realty listing photo of the living room, I could see everything I had envisioned fitting perfectly!

The first thing I wanted to pick out was the flooring.  I LOVE hardwood floors and that was the look I knew I wanted, so I started researching and found a company called BuildDirect.  They offer 5 free samples so I made a couple a lot of orders to find what I wanted.  (I may also have an equal number of tile samples!)

We decided on a variable width unfinished hickory hardwood that would be sanded and stained after install.  However, the sub-flooring in our house was not the right type for laying hardwood, so not only would we pay more for the flooring itself, but we would also have to replace the sub-floor anywhere we wanted to lay it.  We instead opted for an Acacia laminate flooring that still had the character and variation of the hickory but saved us a ton!


With the flooring decision made, I moved on to selecting a color scheme.  I knew I wanted gray walls and some pops of color.  This random pin I came across while surfing Pinterest inspired the color scheme of the room!

First I wanted to figure out seating.  I have a large family so a lot of seating is a must.  I searched for a sectional in a gray tone and found this beauty.
I love this couch in all its tufted glory.  However the only dealer I found was 7 hours away and it was WELL out of my price range.  So I hopped over to IKEA and found this guy!

Still a lot of seating and at a fraction of the cost!  While there I happened upon this fun little club chair in the yellowish-green accent color I was looking for!
Super huge bonus about buying IKEA furniture (outside of the huge savings): All the covers are removable and machine washable!  With two busy and messy kiddos already and only more to come this was a HUGE perk!

I still wanted to get my tufted piece in somewhere so I added this wingback chair to my cart.
I thought this traditional piece would balance out the mid-century modern pieces I had already selected.  In the end this guy didn't make the cut because I got nervous of overcrowding the space.  I will have to find a tufted throw pillow or something in its honor :)

Now a side note about IKEA... I was a little bit leery of the quality/sturdiness of the furniture given that it comes in so many pieces that you have to assemble.
That is just the sectional!

I had tried it out in the store before placing my online order, but got nervous when I sat in it again at the store after the order was in process.  However I could not be more impressed with it!  The cushions are all firm but comfy and I don't have any qualms about plopping down onto it!  I've had a number of people comment that the club chairs are super comfy as well!

Now it was time to consider tables.  I already had two super cute end tables from Target - I LOVE their Threshold line!


I wanted one more end table and found this perfect chartreuse one at CB2.


 Unfortunately, when I finally went to place my order after ogling it for months it was no longer available!  Instead I took a table I already had and after MANY coats of prime, paint and clear coat I gave it a new look.

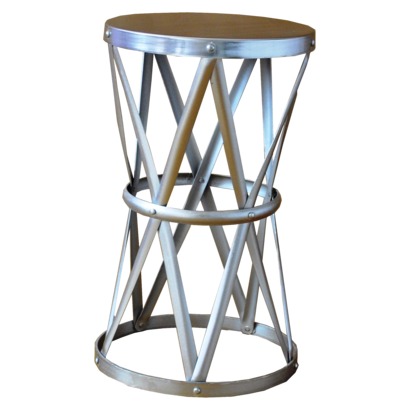
 That just left the coffee table.  I knew I wanted a round one because so many of my pieces were boxy and I wanted to soften it a bit.  I picked this one from CB2, but the $350+shipping price tag was too much for this cheapo!

 So I headed over to Overstock.com since they always promote their free shipping and found this one.

It was $275 with free shipping so a good savings from my original choice, but I was still a little too cheap!

I settled on this one with a price tag of $125 and free shipping!

I hemmed and hawed over area rugs.  Based on my measurements the space would work best with and 8x8 rug and those are a little harder to come by.  I found FLOR tiles at CB2 in the colors I liked that were washable and easily replaceable should they be damaged, but haven't settled on anything yet.

I brought in a cool industrial looking lamp along with some poufs that I already had purchased from Target, and I lucked out and snagged an old utility shelf out of my dad's scrap metal pile to refinish.  Before I ever moved in, this was the vision I had...


And this is what it looks like in the room!

The geometric prints on the wall were a DIY project I blogged about earlier here.  
The couch is in desperate need of more throw pillows!  I got the two throw blankets at IKEA along with the bright blue pillows ($5 each!) and the gray one in the corner is from Target.... they are lonely for some friends! 

 The lamp was a $5 steal from a swap and sell site and I did a fun DIY shade out of tshirts that I will blog on later :)

I was happiest about the salvaged utility shelf.  It allows a lot of display space and can house some photography props, but looks really awesome doing it!  It's currently overwhelmed with decor but it will be dispersed throughout the living and dining rooms once we finish setting everything up!  I was most excited to display the mosaic "Wicked" print at the top because my hubby and I bought it in New York after watching the show on Broadway and it had always seemed out of place with past decor.  The green matches the chairs perfectly!  Other items are sourced below.
TOP SHELF: Antique cameras from a flea market. "Wicked" print from New York. A lantern (needs to be hung in corner) that belonged to my sister who passed away. A little fake plant from IKEA.  A candlestand from Hobby Lobby.
2ND SHELF: Another antique camera flea market find. A clearance chartreuse chevron frame from Michaels.  Letter H from Hobby Lobby. Sculptural metal ball from Target.
3RD SHELF: Geometric print box fro TJ Maxx.  Clear square vase (Future DIY item) from IKEA. Fake plant with pot from IKEA.  Frame from TJ Maxx.
4TH SHELF: Old jars (one from flea market, one found in woods, one found in attic of an old house)  Photo of my deceased sister and her boyfriend given to me by his mother.  Basket received as wedding gift.  My grandpa's old binoculars.
BOTTOM SHELF: Basket received as a housewarming gift from realtor (Shameless plug to go visit Pahlen Realty) filled with photo albums. Antique metal bucket found in sisters crawl space.
The blue handled box next to the shelf is a photo prop from TJ Maxx and the antique egg crate was found in an old house.
View of living room from Dining!  Love the poufs under the coffee table.  Perfect ottomans to rest your feet on or a favorite spot for kiddos to sit around the coffee table.  The other geometric print canvas I made landed on the wall between living and dining areas.  The window wall is a little unbalanced but the space to the left of the window will soon be home to a family pic in a sweet frame from one of my framing companies!

This little vignette is dual purpose.  It looks pretty and fills the void but also houses stuff for photography sessions!  The door is another find from an old house that my photo client allowed me to ransack :)  The suitcase on the bottom was a Christmas gift off my wishlist from my mother-in-law, the middle three were purchased from sell and swap site for $30 total, and the top one I already had.  I think I need to hang something from the door over suitcases but I haven't yet figured out what!
 (p.s. Ignore the wall on the right, it has yet to be primed and painted after being textured, and since it is the entryway of a split level the ceilings are 12 feet tall - WAY too high for prego mama!)

This wall separates the living room from the kitchen.  The original plan was to mount a TV on the wall and create a cool DIY cover to put over it.  However, it turns out my son is VERY friendly/curious/danger seeking/fearless and enjoys wandering running away into other peoples yards and across streets.  The TV mount/cover along with some projects originally planned in master have been put on hold to allow room in the budget for a fence!  
For now I love the canvases of my little baby girl from our trip to Florida in 2010.  The frames on the table look a little sad and will definitely not be staying that way, but may I say I stole them from Target for $0.69 a piece off a 90% off Easter clearance rack!  The table itself is from where else but IKEA!  Its super long (75 inches) and intended to roll over a queen bed, but I loved the simplicity and narrowness of it!  I even saved $40 buying it at the Winnipeg store versus a store in the US.  I don't understand why it was cheaper there but I'm not asking questions!!
Underneath are just a couple photo prop crates.. they may not stay there but that's where they are for now!

It was so fun to see it all come together!  I've still got a little work to finish up but am so excited to call the space my own!!!

Wednesday, May 29, 2013

A sneak peek at my labor of love

It's only a little over a week until we move into our new house and I am so excited to get in and get settled!  I measured every inch of the house during showings and I've been drawing room plans and space planning every nook and cranny since!  I generally despise shopping but have turned a new leaf...don't tell Dave Ramsey... I discovered the marvelous world of online shopping!  Don't worry, my cheapskate side has kept the budget in check and I can't wait to see it all pulled together and show you all my fun finds!!

Being that we are not in the house yet, I've been working on some art projects that we will hang in our new living room!  My sister gave me a 5 pack of 16x20 blank canvases for my birthday last fall and I have been keeping them for a future house project.  I bought some blue painters tape, paintbrushes, and some craft paint and set to work!  

Each canvas was taped off in a different geometric pattern and then painted to coordinate with the overall color scheme of the room.  

Simple project right?  
Tape, paint, remove tape, and voilà... 
DIY artwork I love and can be proud of!

NOT that simple!

First off, let me clarify that perfectionists like myself should only undertake this type of project if they have spent a considerable amount of time mentally preparing themselves for the mistakes they will assuredly make.  

I carefully laid the tape just so, followed a 37 step process to ensure nice clean lines, and then spent a few late evenings touching up all the paint that slipped through the cracks!  
And that was just for one of the five canvases!!

I still am not 100% impressed when I look up close, but here is one of my labors of hate love!

Terrible quality photo, courtesy of my dumb phone, but you get the gist!!

Despite all the work that went into this one, I am still so excited to complete the rest and see how they look on my wall!!

For your benefit, I am including a list of "Do's" and "Don'ts" for anyone who decides they want to take on this project! 

DO
Paint your canvases a base color before taping. 
I painted mine white :)

Pre-plan your tape lines.
Pinterest is a wonderful resource - come up with a theme, "geometric" in my case, and go from there!

Smooth over tape lines to eliminate little bubbles that allow paint to seep through.
I used my credit card like a window scraper.... however, that being said, my canvas had quite a few imperfections so maybe choose a different tool!

Repaint over tape with base color again so it will fill any bubbles you missed.

Paint 2 coats of your color of choice.

Carefully remove tape and touch up any mistakes.

DON'T 
Get overzealous and try to take on a pattern that is too intricate.
This particular pattern fit that bill!  

Scrimp on the quality of the paintbrushes by buying a multi-pack for $1.
I spent more time picking out tiny little bristles than I care to admit!

Utilize the "ripping off the band-aid" method when removing tape.

Switch brands of your base paint when the first bottle runs out.
I made the mistake of believing that white is white so switching to a different brand of paint wouldn't matter... 
NOT TRUE.  When I touched up the areas where the color seeped through, it looked like I used white out!  This resulted in me trying to repaint over all of the white base with the new white paint, which then resulted in getting the new white paint all over the colored sections, which resulted in me repainting the colored sections, which resulted in needing to touch up where my shaky hand failed me, which resulted in me slowly going crazy!

Over-analyze your work.
As a perfectionist, this is a hard pill to swallow.  I will likely point out all of my mistakes to any person who compliments the canvas because I can't help myself, but when I take a step back it actually looks pretty darn good :)

~~~~~~~~~~~~~~~


I can't wait to finish up the rest of them so you can see them all together!!

Wednesday, April 24, 2013

The Wheels of Change...

I can't believe I haven't written on here for almost 3 months!!  Actually, I can believe it... I am terrible at sticking to anything, hence the utter failure of my New Year's Resolutions!  So much has changed since then and there are more exciting changes to come so make sure to read to the end...

My little guy turned two February 8th!

He couldn't muster a smile for the camera! 
And that crooked picture in the background is enough to drive me crazy!

I am a huge fan of themed parties... I usually like to think outside the box and come up with an obscure, fun concept (like Natalie's Puzzle theme for her 3rd birthday). I failed to come up with something unique so we went with Teddy's favorite character Mickey Mouse!

We invited everyone to Teddy's Clubhouse for the party and I had some Mickey Mouse Clubhouse songs cued up for kiddos to dance along to!


We had a little help from Toodles!


All the kiddos donned handmade Mickey Mouse ears. 
*Helpful tip, do not wait until the night before to start making the ears! 
Also, just go ahead and pay a little more for self-adhesive felt...
felt + tacky glue = Headache!

After eating Mickey Mouse pancakes and "hotdogs" (sausage links), they painted some Mickey Mouse pictures...


...then went fishing for red gooey fish!


The kids had fun and so did I!!

My little lady is turning four next week! 
 
I was stuck when trying to come up with a theme for her party.  I wanted to do a lifesize Candyland concept, but the confines of apartment living coupled with old man winter refusing to take a hike squashed that idea quickly.  We settled on a Bubble Gum Bash by default... I had purchased some mini gumball machines on post-Easter clearance that I was planning on saving for a future party (yes I've started planning her 8th birthday party).  Natalie saw them and begged to have a bubble gum party now... somehow my explanation of "just wait 4 more years" didn't quite register with her... so we're going with it. 
 
My little tiny one is growing quickly. 
 
I am halfway through the pregnancy now and can't wait to see his/her little face on the ultrasound next week!  Apparently this baby just wanted to make my belly pop right out! I've been asked if I am carrying twins and often get a shocked, almost mortified look when I respond "September 14th" to the question "when are you due?" 
 
I have 9 days until I can finally say I am a college graduate! 
 
How pathetic... it only took me a span of 8 years to get a bachelors degree!  But lots of people take that long to graduate right?  "Yeah, they're called doctors!" (Gotta throw in a little Tommy Boy whenever possible).  In fairness, I did only take 7 semesters to do it... I just took my sweet time!
 
--------------------------------------------------------------------------------------------------------------------------
 
I saved our biggest and most exciting changes for last! 
 
My hubby has accepted a position with a new company...
 
which means that
 
We are moving!!
 
We are packing up the UHaul in 10 days and will make the 2 1/2 hour drive back to our hometown!!
 
I will miss so much of our life here...

CHURCH
 
We had to search a bit to find the right fit, but once we did we settled right in!  Grace Baptist has been so wonderful to us... the children's programs are amazing, the ladies' ministry is wonderful, our small group is the highlight of every other week, and the preaching is always insightful and challenging.
 
MOPS

I had the pleasure of serving on the steering team for my local chapter of Mothers of Preschoolers for the past year.  The friendships that I formed within the steering team are some of the closest I have, and I've so enjoyed having an excuse to hang out with mamas a few times a month. 
 
The O.G.
 
I started working at the Olive Garden out of necessity.  We were paying for an apartment and the sale on our house had fallen through, so we needed the income to cover both until we secured new buyers.  Olive Garden was about to open and was a hop skip and a jump from our house so I applied.  I never imagined looking forward to going to work (I'd much rather stay home and play with my kids), but the people at O.G. make it a fun place to be and I will miss them!  And the breadsticks! And the Chicken Gnocchi soup!! 
 
FRIENDS
 
You know who you are... you are the ones I laughed and cried with, celebrated and grieved with, vented to and offered advice to.... you took my kids when I just needed a break and I returned the favor when you thought you might pull out your hair... we double-dated, play-dated, and mommy-dated... we dreamed and planned and schemed our futures and our kiddos futures together and it breaks my heart to leave you all.  I won't forget you and all the memories!!

Along with all the important stuff previously listed, I will miss the convenience of living within a minute of Target, Old Navy, Sams, the Mall, Olive Garden and Texas Roadhouse.... oh how I will miss Texas Roadhouse!!

But despite all that we are leaving, I am so excited for this next chapter in our lives!

HOUSE
 
We bought a house!  It's right around the corner from two of my sisters' houses and is exactly what I was hoping to find! We can grow into it and stay there for 20+ years, we won't have to put up or take down any walls, but can still completely make it our own, and it has a nice yard perfect for the kiddos!!  We won't close on it until a month after we move back, so we'll be staying with my sister and her family!
 
FAMILY 
 
Two of my sisters and my parents live in our hometown and another sister lives 20 minutes away.  My hubby's parents and sister also live in our hometown.  It will be so nice to get to see all of them and have my kids grow up with their cousins!  The Boston Marathon bombing left us all on pins and needles as we waited to hear from my sister who was spectating the race... by God's grace she missed the bomb by 1 minute and came safely home... but I am holding my family a little closer after this scare and am so excited to be able to spend more time with them!
 
FRIENDS
 
 I can't wait to reconnect with old friends and make new ones too!  I can't wait for lazy days at the outdoor pool, summer bbq's and just getting to chat while the kids play!  I can't wait for the ladies' nights, the dinner parties and the playdates!  I can't wait to laugh until my sides hurt and to pick your brains for advice on everything from parenting to renovating!
 
BUSINESS
 
I left my hometown a little over a year and half ago.  I had opened my photography business four months prior to the move and had to close it just when it got going!  Although it will likely take a bit before I am ready to reopen, I am so excited for when I can announce that it is up an running again!!
 
--------------------------------------------------------------------------------------------------------------------------
 
Hopefully it doesn't take me 3 months to post again, but I can't make any guarantees!  Keep your eye out for a blog on the new house renovations!!!